Creating a static test suite
How to create a static test suite and assign member test modules to it.
Perform one of the following procedures to create a static test suite:
Option #1:
Select the Test Suites node
 in the TestArchitect explorer tree.
Select File > New test suite.
Fastpath: Ctrl + N
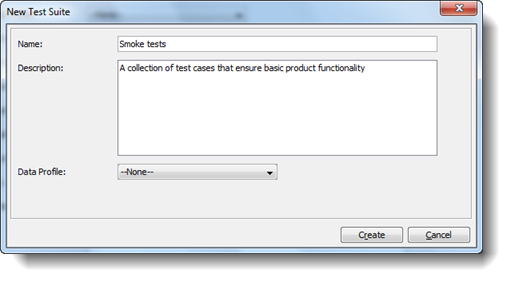
In the New Test Suite dialog box, specify the details of the test suite:
- Name: Unique name for the test suite.
- Description: (Optional) Short description for the test suite.
- Data Profile: Select None to indicate that the test suite is static.

Click Create.
Option #2:
In the TestArchitect explorer tree, right-click the Test Suites node
 , then click New Test Suite.
Fastpath: Ctrl + N
In the New Test Suite dialog box, repeat steps 3 and 4 of Option 1.
Option #3:
Select a test module that is to be included in a static test suite.
Click the Execute
 button on the toolbar.
In the Execute Test dialog box, click the Save as Test Suite button.
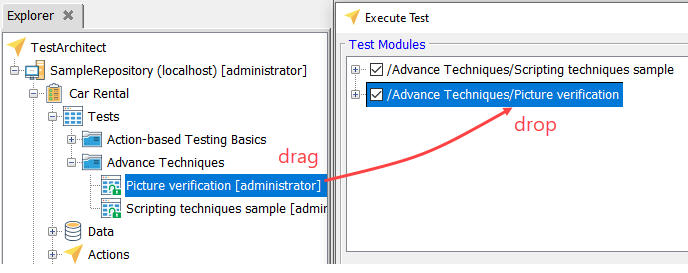
Tip:You can include additional test modules in the static test suite by dragging other test modules from the TestArchitect explorer tree and dropping them into the Test Modules panel.
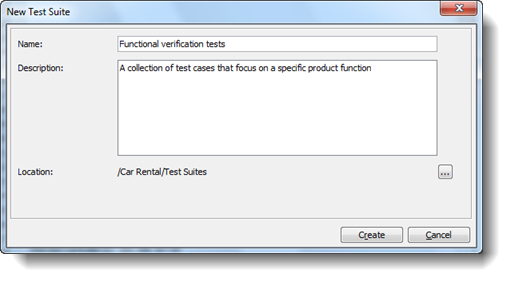
In the New Test Suite dialog box, specify the details of the static test suite:
- Name: Unique name for the test suite.
- Description: (Optional) Short description for the test suite.
- Location: (Optional) Browse to the location in the TestArchitect explorer tree in which to save the test suite.

Click Create.
Option #4:
Double-click the Tests node on the TestArchitect explorer tree.
The test module list view appears in the main panel.
In the list view, select those test modules you wish to be included in the static test suite. (Note that the Shift and Ctrl keys may be used with the mouse to aid in multiple selection.)
Right-click over one of the selected test modules, then click Create Test Suite.
In the New Test Suite dialog box, repeat steps 4 and 5 of Option 3.
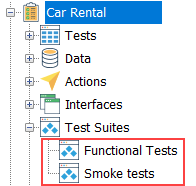
The new static test suite is saved as a node beneath the project’s Test Suites folder in the TestArchitect explorer tree.
