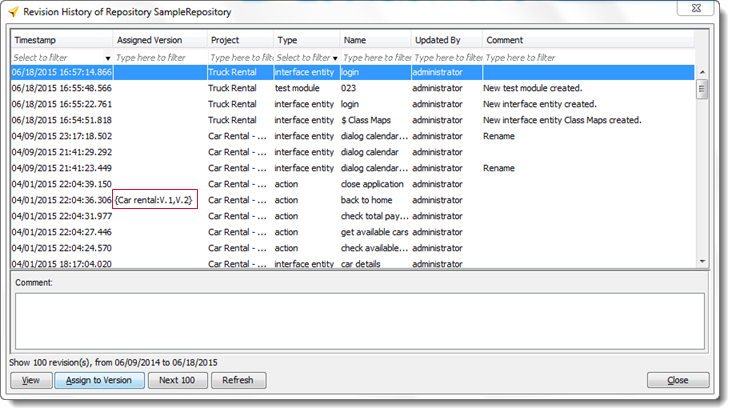
Revision tag
A “revision tag”, or Revision Timestamp, can be assigned to any version node of a repository’s Systems and Platforms tree. It is useful for Time Traveling execution, in that it allows that version node to be associated with a specific timestamp. Hence you can create version nodes specifically for the purpose of time travel execution, and assign meaningful names to those versions. In general, the timestamps assigned to revision tags are taken directly from revisions of existing project items, although it is possible to supply arbitrary timestamps. In TestArchitect, an AUT version node is used to tag a specific revision, since a version commonly identifies a specific release of the AUT, such as version 1.2.
- Ensure that you have already created a system node and the associated AUT version nodes that you require.
- To access revision history, you must be a member of a group other than guest for the repository in which the project item is stored. In addition, you must be granted access to the desired projects and project items.
To associate an AUT version with a specific revision, do the following:
Option #1: From a version node in the TestArchitect explorer tree.
In the TestArchitect explorer tree, double-click a version node under the Systems & Platforms node.
In the Information tab, the Revision Timestamp box displays the associated revision, if any. Otherwise, it is empty.
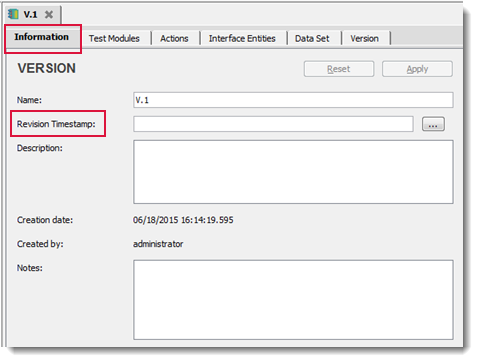
Click the Browse
 button to look for a suitable revision.Notes:Alternatively, in the Revision Timestamp box, you may directly enter a revision you wish to associate with. The format of a revision, or timestamp is
MM/dd/yyyy hh:mm:ss.mmm, for example:04/09/2015 22:04:27.446. However, it is not recommended that you enter the timestamp by hand.In the Select Timestamp dialog box, select a revision with which you want to associate the given version.
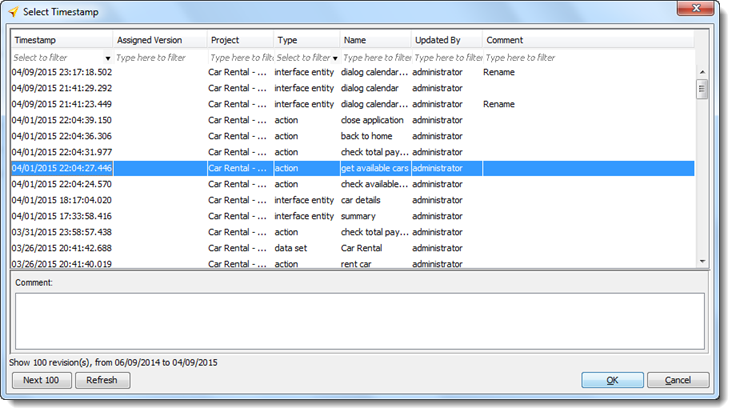 Important:It is not possible to select multiple revisions: only one revision timestamp may be associated with a given version node. On the other hand, a given revision may be associated with any number of version nodes, and this can be accomplished in a single operation (see Option #2 below).
Click OK.
The Revision Timestamp box is updated with the timestamp of the selected revision.
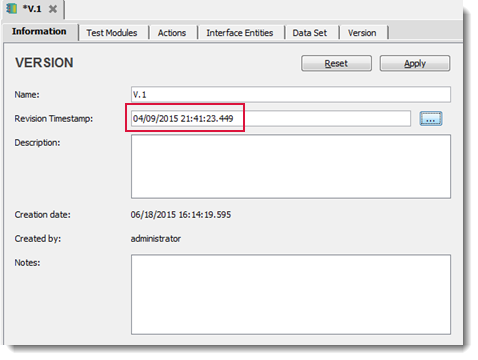
Click Apply to save the changes.
Option #2: From the Revision History dialog box.
Invoke the Revision History dialog box by right-clicking the repository, the project, or the project item node in the TestArchitect explorer tree.
Notes:Only the following project items have revision control:In the Revision History dialog box, select a revision whose timestamp you wish to associate with a given version node (or nodes).
- Click the Assign to Version button.
- Alternatively, right-click the selection, then select Assign to version.
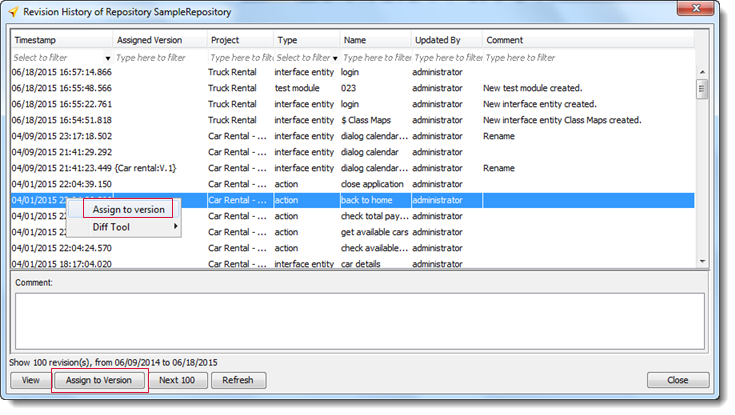
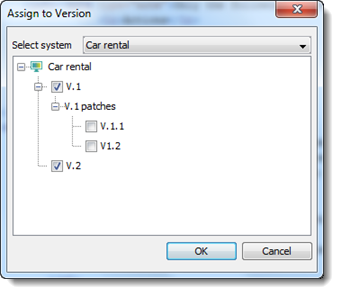
In the Assign to Version dialog box, select the checkbox(es) of the version node(s) to be associated with the selected revision timestamp, and then click OK.
 Important:
You can select multiple versions belonging to a single system. However, you are prohibited from selecting version nodes belonging to different systems.
Note that a version node can be associated with only one revision at any given time. If you select a version that is already assigned to another revision, you are prompted with the following warning:

Clicking Yes causes TestArchitect to automatically remove the timestamp previously assigned to that version, and to assign the new timestamp to it.
The associated version(s) is displayed in the Assigned Version column.
