Running TestArchitect tests from Microsoft Test Manager
After creating a TA-TFS integration project in Visual Studio that contains test cases, you can plan your tests, execute test cases, and view test results in MTM.
Ensure that you have already taken the following steps:
- Deployed and configured:
- Configured and registered:
- Established a connection between TA and TFS. (Learn more.)
- Mapped the TA project containing the test cases of interest to a TFS project. (Learn more.)
- Mapped TA test cases to TFS test cases. This can be achieved by any of the following means:
- importing TFS test suites or test cases into TA,
- uploading TA test modules/tests cases to TFS,
- performing manual mapping between TA test cases and TFS test cases.
- Created a TA/MTM integration project. (Learn more.)
- Associated TA test cases with TFS test cases. (Learn more.)
- Created and queued TFS team builds. (Learn more.)
- Created and configured test plans. (Learn more.)
Run MTM and connect it to the team project from TFS where your project resides.
- Visual Studio 2017, 2015 (learn more).
- Visual Studio 2013.
In MTM Testing Center, click Test on the ribbon. Then click the Run Tests tab. Double-click your TFS project in the project explorer tree.
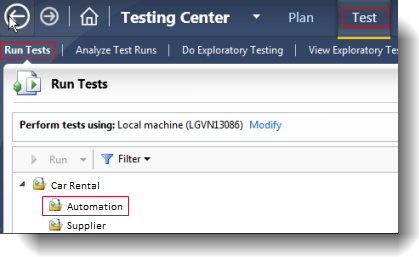
Your selected project appears in the MTM main window panel showing the test cases that are linked with TestArchitect test cases.
In the MTM main window panel, right-click a test case that you want to run and choose Run.
The selected test case must be of the automated type. (That is, the value of Automated must be Yes.)
Notes:If you want to run a test in a different environment or with different test settings, choose Run with options.The TestArchitect Execution dialog box appears.
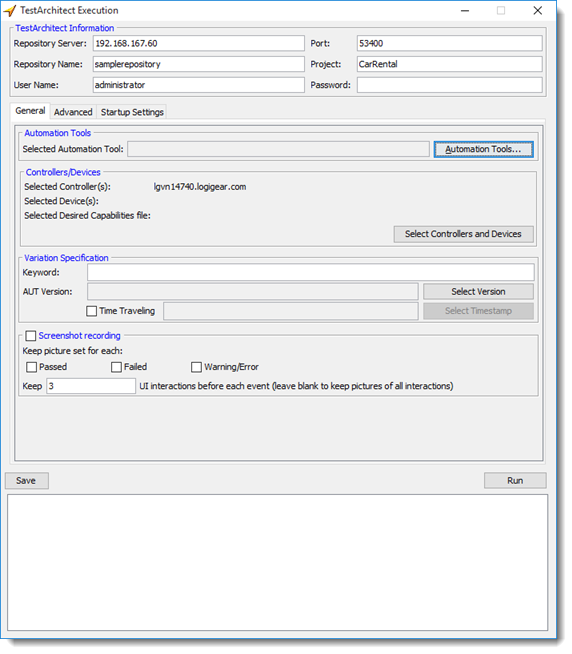
In the dialog box, enter the requested information, as described here.
Remember:- To save all defined configurations, click the Save button in the TestArchitect Execution dialog box.
- By default, the TestArchitect Execution dialog box only appears on the first run. If and when the configurations saved from the previous run are no longer valid, the dialog box reappears on the subsequent run.
In the TestArchitect Execution dialog box, click Run to execute the tests.
Important:If you are executing tests for the first time, you are prompted to enter your TestArchitect license server information. Enter the required information in the dialog box. If the specified license server is reached successfully, or the trial key is validated, the provided license information is stored. From then on, you will be able to execute tests without again being prompted for this information.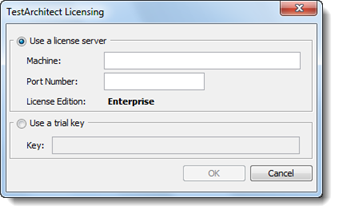 Caution:
MTM’s automated tests settings include two timeout settings for imposing limits on automated test times. If these settings are enabled, you must ensure that they meet or exceed the maximum expected test times for your tests. These settings are available under MTM’s Lab Center, under Test Settings > Timeouts:
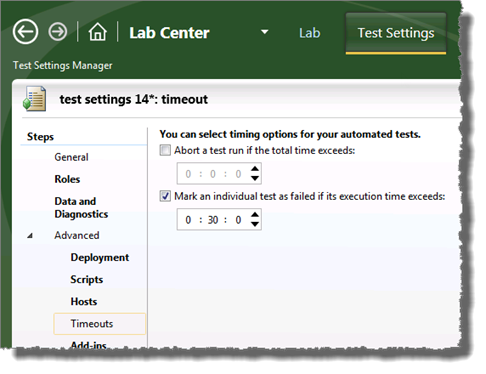
The first setting, Abort a test run if the total time exceeds:, when enabled via the check box, attempts to enforce a ceiling on the total run time of your test run. Should you set a value here and your test run exceeds it, your test is not aborted or directly affected in any way. However, your test results will not be uploaded to TFS.
The setting Mark an individual test as failed if its execution time exceeds: is applied to each individual test of your test run. Hence, if it is used (which we advise against), you should ensure that it exceeds the maximum possible test time of your longest test of the test run set.
Caution:If this setting is enabled and any one of your tests does exceed its value, it may have the effect of corrupting the transferred results of other tests in the set.
A test run panel appears showing the status of the running test. Initially, the Result Overview section displays the current state of the tests as pending while the test cases are run. After the selected test cases finish their runs, the Result Overview section is updated to show the status of the test runs.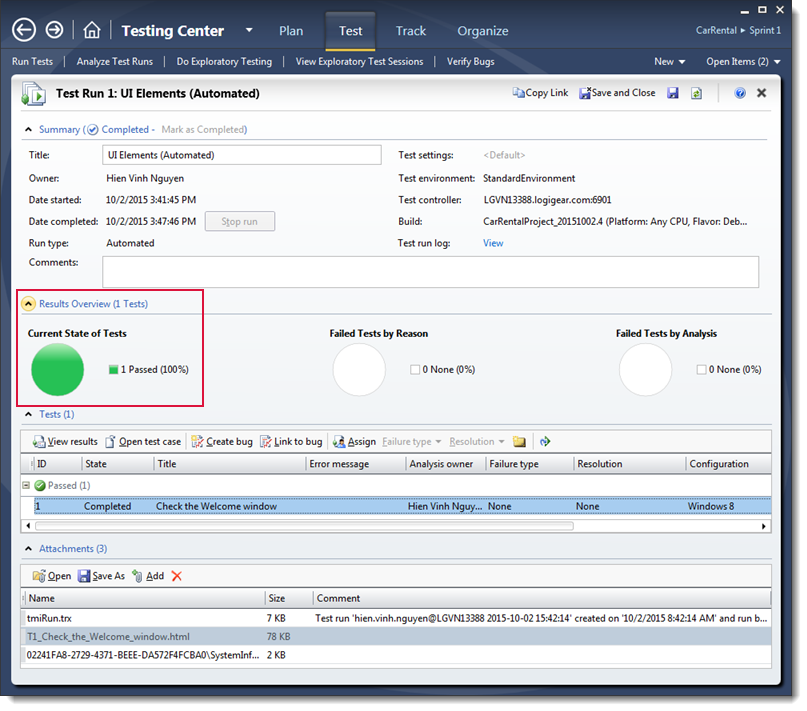
Additionally, the test run results are generated, and then uploaded into the Attachment sections as HTML attachment file(s).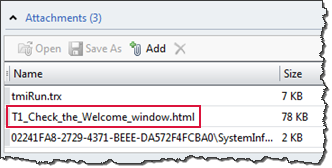
- Right-click the attachment file and select Open to view the test results in a browser.
- The layout of the generated test results when test cases are executed in MTM is similar to the layout displayed when the same test cases are executed in TestArchitect.
Related concepts
Default port numbers and port ranges
