Mapping a TestArchitect project to a Team Foundation Server project
Mapping a TA project to TFS team project allows you to upload test results to TFS.
Ensure that the following requirements are met:
- Your TestArchitect repository is configured for a connection with Team Foundation Server. (Learn more.)
To map a TestArchitect project to a TFS project:
In the TestArchitect explorer tree, double-click the TestArchitect project that is to be mapped to a TFS project.
The given Project tab appears in the editor.
In the Source field, specify the team project to map to.
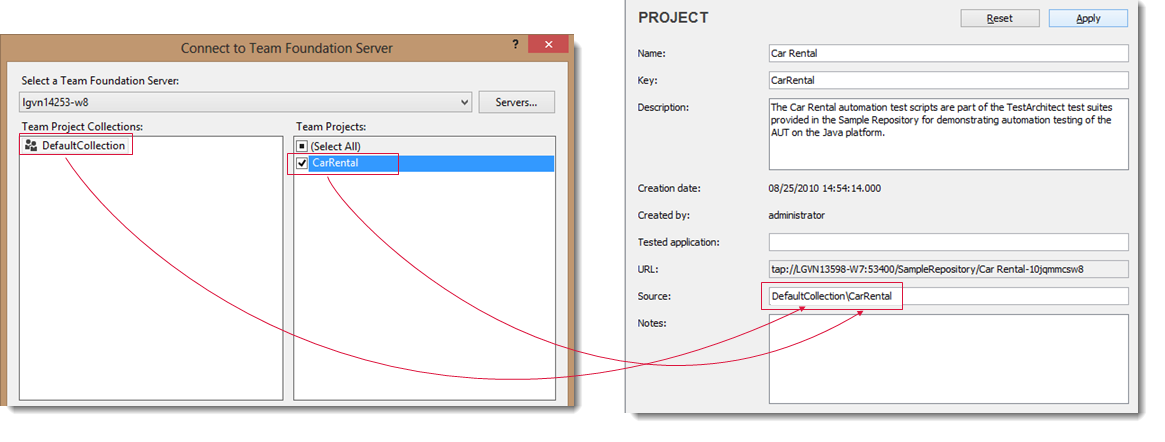
The format must be in the form of the TFS Team Project Collection name, followed by a backslash (\), followed by the (case insensitive) TFS Team Project name. You can obtain this information from within Visual Studio from the Connect to Team Foundation Server dialog box. (Refer to your Visual Studio Help to learn how to access this dialog box.)
For example, to point to the TFS CarRental project shown below, you would enter DefaultCollection\CarRental into the Source field of the Project panel.

Click Apply.
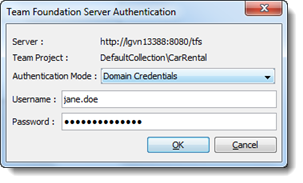
In the Team Foundation Server Authentication dialog box, select Domain Credentials from the Authentication Mode box and then and then enter your TFS user name and password.
 Notes:
- This dialog box is only displayed the first time you connect to the TFS server and map a project. It will not appear again unless there is a change in the TFS server or user account/password.
- If necessary, you have the option of switching from the current credentials to different ones. (Learn more.)
Click OK.
If authentication succeeds, a confirmation dialog box to that effect is displayed.
Click OK to close the confirmation dialog box.
