Screenshot recording
Debugging blindly can be tedious work, especially when your test tool does most of its work through the user interface. Moreover, bugs can sometimes be hard to replicate when single-stepping through a test procedure. To address this problem, TestArchitect allows snapshots to be automatically taken of the AUT’s display at various critical points during test execution. By letting you observe the display state of the AUT at each stage of the test, you can have a better grasp of where and how a test, or application, is going wrong.
Suppose you executed a long automated test that contains a good deal of interaction with the interface of the application under test, such as mouse clicks, keyboard input, menu item selection, etc. When viewing the generated test result, it may be difficult to understand why some fails, errors or warnings have occurred. It might be easier to identify the problem if the test result were accompanied by snapshots of the screen’s display just before, during and after any interactivity between the test and the AUT’s UI. This is the function of TestArchitect’s screenshot recording: it captures screenshots during test automation attendant with each UI-interactive action. These screenshots help you better visualize what took place and more easily debug many of the problems that occurred.
- TestArchitect captures images only for those actions that correspond to UI-interactive actions. Other actions are not accompanied by screenshots.
- The mouse pointer is not captured in the screenshots. (However, for UI-interactive actions that apply an actual stimulus to the GUI, that point of stimulus, such as a mouse click, is highlighted. )
Screenshots captured during test automation
With screenshot recording enabled, TestArchitect captures screenshots during test execution. It effectively snaps pictures for each UI-interactive action and posts all or some of them to the local test result.
- First, you have the option to limit the number of images retained upon conclusion of a test run. You configure these settings at the start of execution in the Execute Test dialog box, which is also where screenshot recording is enabled.
- Second, snapshots that TestArchitect deems redundant and unnecessary are discarded.
- Third, captured screenshots are discarded when the local test result is added to the repository. This removal takes place regardless of whether the automatic or manual method is used to transfer the results to the repository.
See below for a full discussion of the rules regarding screenshot retention.
Results display
Screenshots captured during testing are displayed in the Result Details and Failure/Error Summary tabs of local test results.
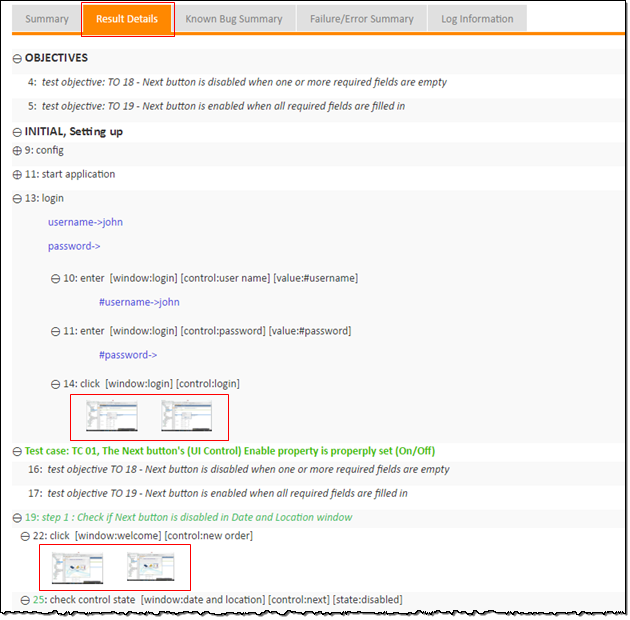
Screenshot viewer display
On the web browser, when you click a captured screenshot in the Result Details tab, the screenshot viewer, appears.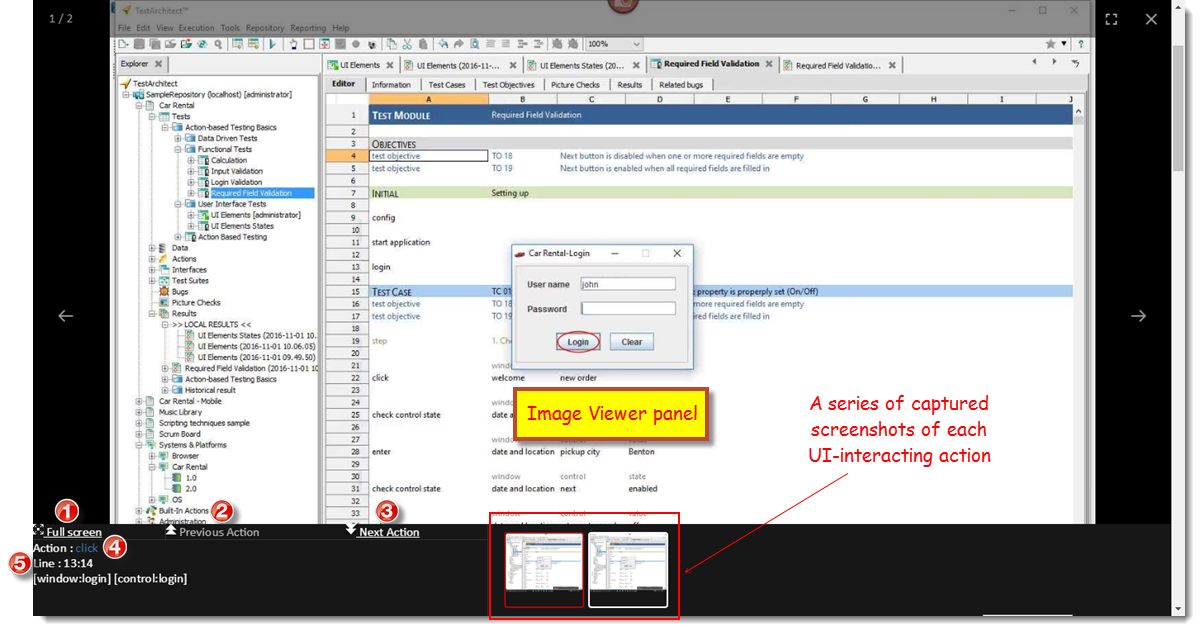
The screenshot viewer incorporates a number of functions (below).
- Fit screenshot to the Image Viewer panel (full screen)
- Go to the previous recorded UI-interacting action
- Go to the next recorded UI-interacting action
- Click on the action name to launch TestArchitect Client, displaying detailed description of the UI-interacting built-in action.
- Click on the action line number text launch TestArchitect Client, displaying the corresponding line in its execution context.
Video playback
TestArchitect doesn’t only snap pictures. When you have screenshot recording enabled. TestArchitect creates a video of snapshots from important points during the test and stores it at the end of the test run as a video (.mp4) file on your machine.
A sequence of captured screenshots are compressed and compiled into a (.mp4) video file in order to save hard drive space. In other words, this video is a means of image compression.
You may wonder why it is necessary to filter out so many screenshots. The reasons are twofold:
- First, TestArchitect tries to give you only the most relevant screenshots in your results, to avoid overwhelming you with unnecessary, and often redundant information.
- Secondly, retention of screenshots is limited for space purposes: screenshots are stored in your test results. Screen-recording videos, by contrast, are stored simply as local files on your PC, and don’t present the same kind of space issue.
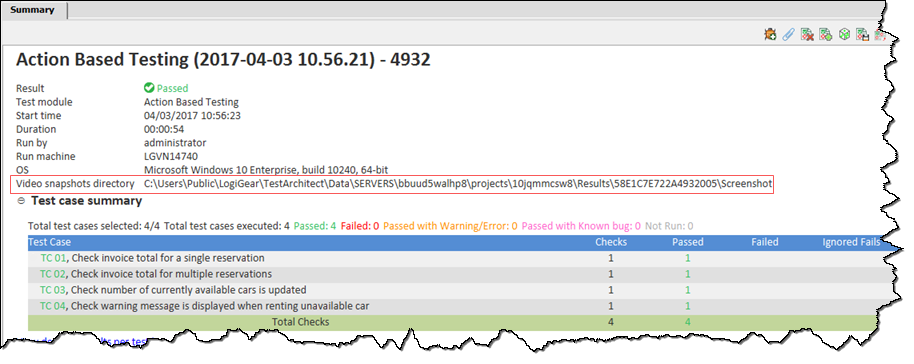
To identify the location at which screen-recording videos (taken during the automated test runs) are stored, TestArchitect provides a folder path at Video snapshots directory in test results on both a web browser and TestArchitect Client. You can easily copy and paste a link to open the location.
Figure: The video snapshot directory in test results on a web browser
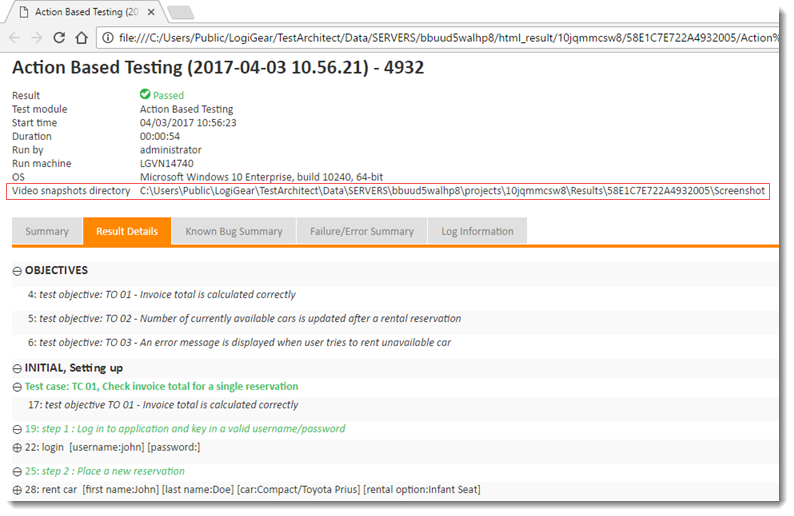
Figure: The video snapshot directory in test results on TestArchitect Client
Screenshot capture and retention rules
With screenshot recording active, TestArchitect always captures screenshots of the entire desktop screen.
Screenshots are useful for debugging, but one problem is that TestArchitect generally must capture a screenshot before it can determine whether or not it provides useful information. For example, it’s only when a check window exists action fails that you suddenly have a need to know what the screen looked just before the click action that preceded the check. Hence the automation must capture a lot of screenshots, but it also makes it a practice to “thin the herd” as it proceeds, removing all unnecessary images.
To deal with issues of utility, performance and disk usage, and to avoid taxing the user with an excess of unnecessary screenshots, TestArchitect observes a set of rules that determine when screenshots are captured, which screenshots are retained, and which ones are logged. Two factors cause TestArchitect to discard certain screenshots on the fly. In some cases, TestArchitect automatically discards screenshots moments after they are taken, depending on subsequent test conditions, when it determines that they have no value. In other cases, TestArchitect throws away screenshots that the user has specifically indicated he/she does not want.
The rules are as follows:
All UI-interacting ABT actions incorporate one or more operations, or preconditions, which involve checking to verify the existence of a given UI element which is essential to completion of the action. Often these involve matching a window or control. (For example, in following action line,
            window      control
click       login       clear
the application of the actual mouse click is preceded by, and dependent on, a test for the existence of the login window, followed by a test for the existence of the clear button.)
TestArchitect takes screenshots in the following order:
- before a window match (if the action references a window)
- after a window match (if the action references a window)
- after a control match (if the action references a control). Note, however, that in each case above, if the match operation succeeds, the prior screenshot is discarded. (Also note, as described below, that the remaining screenshot may also be discarded if a subsequent shot is identical to it.)
For any UI-interfacing ABT action that involves a stimulus such as a click, select, type, or tap operation: if the preconditions have been satisfied, a screenshot is taken at the moment just before the stimulus occurs. At that point, the “after control match” screenshot is discarded.
Notes:The stimulus point (e.g., mouse click) on the captured before screenshot is highlighted with a red circle.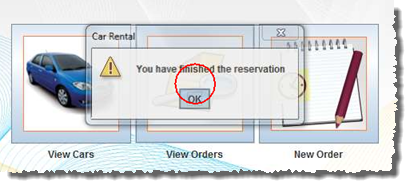
A final screenshot is taken upon the conclusion of every UI-interacting ABT action.
In instances where more than one screenshot is being retained for an action, but two screenshots are identical, the older one is discarded.
When there is an automation problem, (for example, an unmatched window, undefined control, etc.), not including syntax errors, TestArchitect captures a single screenshot at the moment the problem occurs.
For a UI-interacting user-scripted action, TestArchitect captures only a single screenshot at the moment immediately following completion of the action.
Finally, the number of screenshots retained by TestArchitect is determined by your settings in the Screenshot recording panel of the Execute Test dialog box just prior to your test run:

In it, you specify the events (Passed, Failed, or Warning/Error) for which associated screenshots are to be retained. You also specify the number of preceding screenshot sets that are to be retained for each qualified event. A single screenshot set consists of all the screenshots captured during a single UI-interactive action. The above figure indicates that three screenshot sets are to be retained and logged for each Failed and Warning/Error event of the test: the screenshot set of the associated Failed/Warning/Error action, and the screenshot sets of the two UI-interactive actions preceding it. Note that if the Keep field is left blank, screenshot sets for all preceding UI-interactive actions are retained.
Notes
- Android: Screenshot recording, when applied to a connected Android device, requires that the TestArchitect Agent service be running. Note also that, if and when an Android device is restarted, TestArchitect Agent is then stopped. Should this be the case, it is essential that you reactivate the service by observing the following steps:
- Connect the Android device to the test controller through a USB cable (not Wi-Fi), if not already so connected.
- Open the Android Instrumentation Tool dialog box.
- Click the Refresh devices list
 button.
Capturing screenshots during test execution
With screenshot recording active,TestArchitect captures screenshots during test execution for each UI-interactive action. Depending on your settings, it retains some of these screenshots and logs them to the generated test result.
Capturing screenshots in Web Testing
TestArchitect currently provides two ways of capturing screenshots:
Related information
Exporting local test results to an HTML file
Result Details tab
