Updating interface definitions
When the Action Recorder generates actions that operate on windows and controls, it populates the arguments of those actions with TA names. If necessary, it allows you to define those names “on the fly”.
If the windows and controls visited during a recording session have already been defined in the matching interface entity (or, in the event more than one exists, the matching interface entity that you select), the recorder recognizes them and inserts the TA names directly into the actions. It is therefore recommended that you define the requisite interface entities and elements first, before using the recorder.
When interface entities and elements are not created for given windows or controls prior to recording, the Action Recorder allows you to name them at the conclusion of recording, as demonstrated below using the About window of the Car Rental application.
If the Car Rental application is running, return to the Login window; otherwise, start the application by selecting Start > All Programs > TestArchitect > Samples > Car Rental Application.
The login window appears.
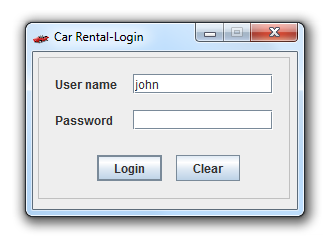
Click Login, to log in with the default user name and password.
The Car Rental-Welcome window is displayed.
Select About > About.
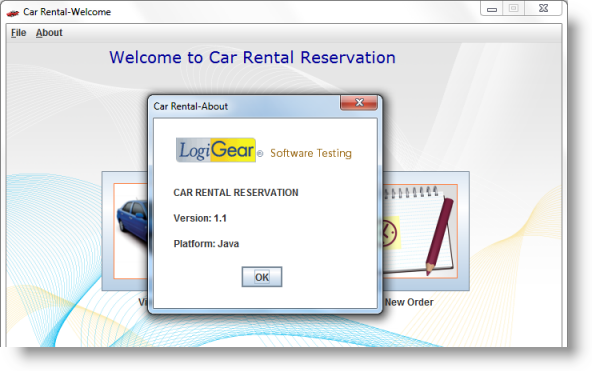
The Car Rental-About dialog box appears.
Return to TestArchitect.
In the
Recording Lessontest module you created previously, create a new test case:Place your cell pointer on a line somewhere below the existing set of action lines (but before the
FINALsection, if any).Click Create New Test Case
 on the toolbar.
A test case line similar to the following is inserted.

In the second column of the new line, assign the test case an ID of
TC 03(if not already set to that value).Optional: Press
Tabto advance to the next column, and provide a description for your test case, such asAdding interface definitions.
Select an empty cell within test case
TC 03.
Start the Action Recorder by clicking the Action Recorder icon on the toolbar.

The Action Recorder panel appears in the lower right corner of the screen, indicating recording mode is now in effect.
Click the onscreen text that reads
Version: 1.1on the Car Rental-About window.Notes:Although this text object is not a control that responds to your click, the action will be recorded, including the exact coordinates of the location of the click.Click OK to return to the Welcome screen.
Click the onscreen text string
Welcome to Car Rental Reservation.Click Stop on the recording panel.
The New Interface Definitions dialog box appears.
Notes:If this dialog fails to appear: The Car Rental sample project installed with TestArchitect does not include interface definitions for the three controls you’ve just clicked on (and has no interface entity for the Car Rental-About window). If New Interface Definitions does not appear, however, it is likely the interface definitions needed for the generated action lines already exist, possibly because someone already performed this exercise with your repository. Delete them (the window and control arguments of your generated action lines tell you where to find them) and start the exercise again.
New Interface Definition dialog box
The New Interface Definitions dialog box is comprised of three panels:
- New interface entities and elements (leftmost panel)
A list of the windows and controls involved in the previous recording and requiring interface definitions. (Note that windows appearing here include both those that require a definition as well as those that are already defined, but require a new control definition.) Windows are displayed as root nodes, with interface entity icons .Notes:The names accompanying interface entities that do not yet exist are TestArchitect’s suggested TA names, and may be modified here. TA names of existing interface entities may not be changed.
 - Properties (center panel)
A list of the properties-value pairs for the item currently selected in the New interface entities and elements panel. For an existing interface entities, the properties displayed are those that the entity currently uses to map to a window. For a non-existing entity of element, the listed properties are those that TestArchitect will use to create the mapping.Notes:Unlike the Interface Viewer, you cannot select which identifying properties are to be used for the mapping of an interface entity or element at this stage. You may, of course, modify them after the interface entities have been saved. They can be changed either by hand or through the Interface Viewer. - Screen shot (rightmost panel)
Screen shot of the window represented by the selected interface entity in the leftmost panel. When the node of an interface element (control) is selected, the corresponding control is outlined in red.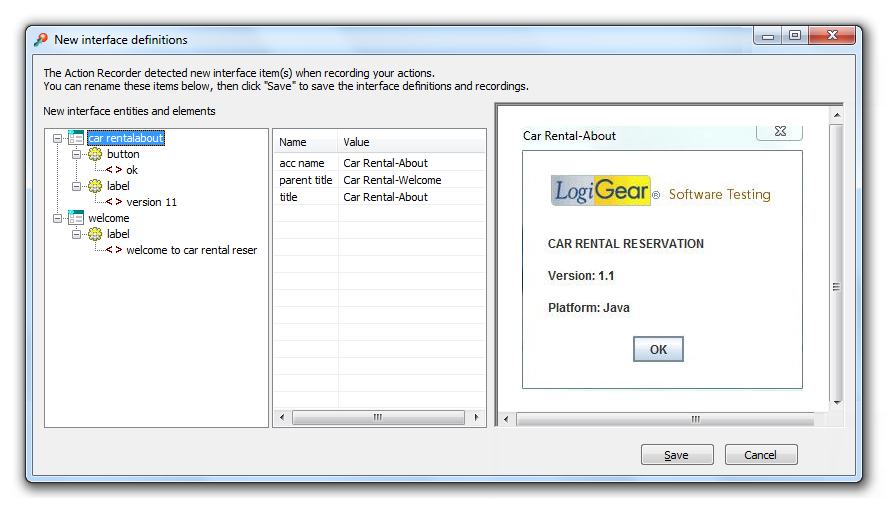
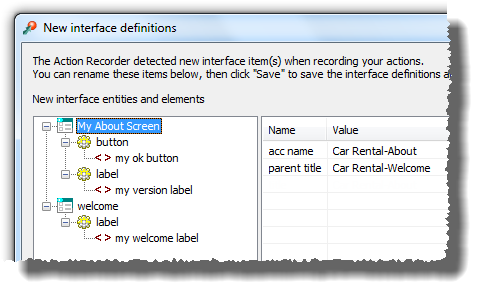
Change the auto-generated TA name for the About screen: in the leftmost panel, right-click the node
car rentalabout, select Rename, then typeMy About Screen.Change the auto-generated TA name for the version label: right-click the element node reading version 1.1, select Rename, and type
my version label.In similar fashion, change the node ok to
my okay button.Now rename the
welcome to car rental reservationnode tomy welcome label.The dialog box should now resemble the following:
Click Save. to add new action lines to the
Recording Lessontest module, and to save the new interface definitions.Control returns to TestArchitect, which displays the newly generated action lines, along with the TA names defined by you (with the exception of welcome):

Right-click either of the my about screen window arguments, and select Edit Interface Entity.
The newly generated interface entity for the About window is displayed, along with the two interface elements you created for it during the recording process, and the TA names you assigned in the New interface definitions dialog box:
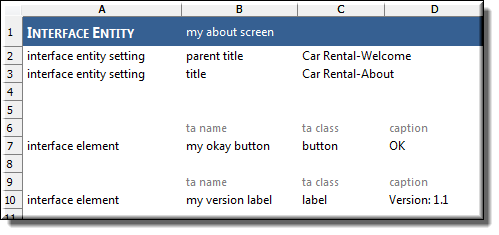
You have used the Action Recorder to generate action lines, as you did in the prior exercises of this Lesson. This time, however, your manual interactions involved controls (and a window) which were not yet defined by your project’s interface. The Action Recorder responded by creating new interface definitions, allowing you to assign your own choice of TA names to them.
