Creating test steps
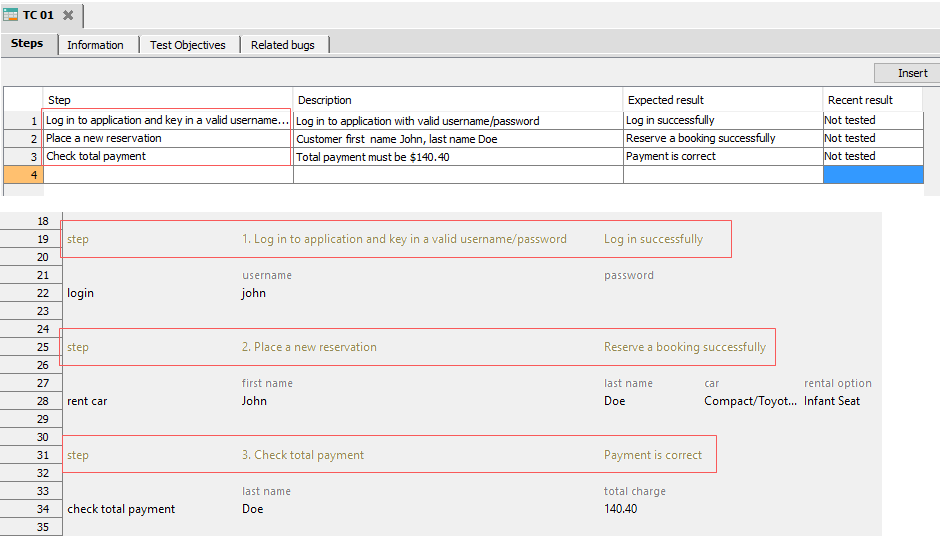
Create test steps with the steps list view.
To create test steps, follow the steps below:
Check out a test module.
In the TestArchitect explorer tree, double-click a test case for which you would like to create new steps.
The steps list view appears in the main panel.

Enter the following information for each step:
Step: Title of the test step.
注意:- Its maximum allowable length is 30,000 characters.
- It does support multiple lines. Provided that you type more than one line in the Step field, the lines automatically merge into a single one.
Description: (optional) Short description for the test step.
ヒント:To start a new line in the same cell, press Alt + Enter on your keyboard.Expected result: (optional) Define the expected test step result.
Recent result: (read-only) The actual test step result.
注意:- The Recent result field is automatically filled in with the results of the most recent test execution added to the repository.
- Possible returned values are:
- Not tested(default)
- Passed
- Failed
- Passed with warning(s)/error(s)
- Passed with known bug
Click Apply.
A new step is added to the test case for each pass of the above instructions. . Also note that, by default, the new test step is automatically added to the bottom of the parent test case in the test module editor view.
- Invoke the Preferences dialog box.
- Clear the Automatically insert step to test case check box.
- Click Save.
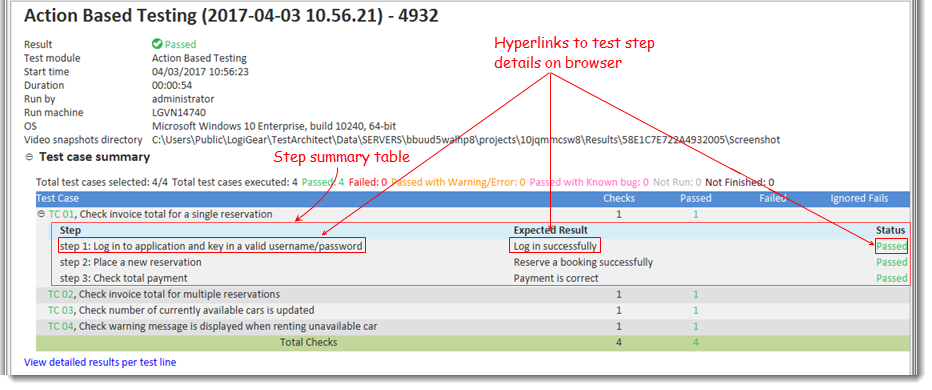
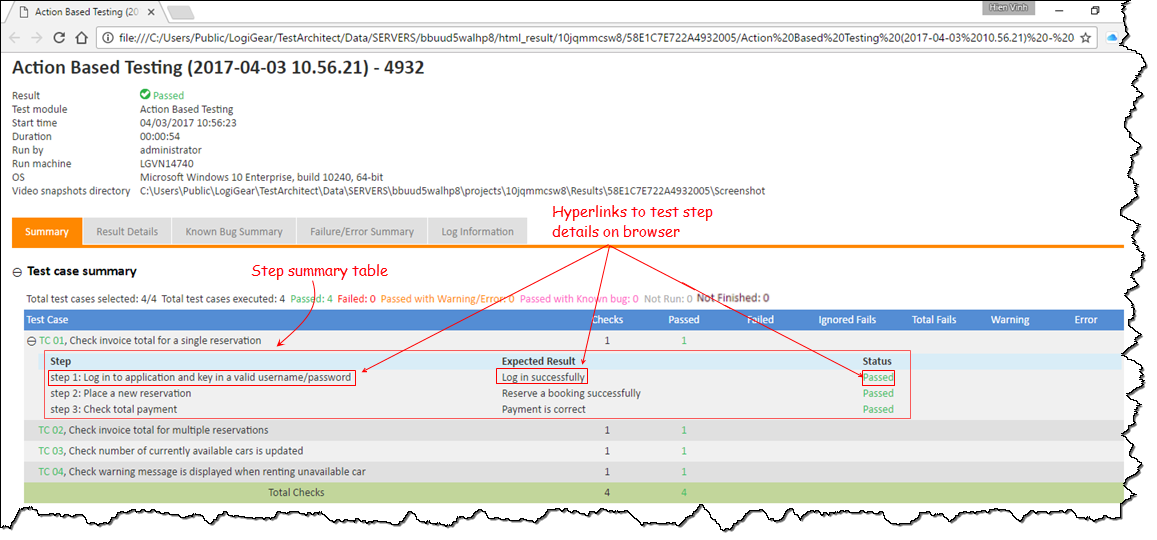
After you execute an automated test, the Step Summary table appears in test results on both TestArchitect Client and a web browser. With the support of this table, you might take a quick glance at which test steps have automation problems. Also you might grab the test flow thoroughly when you can identify the exact test steps in which the failures, errors, or warnings occur.
 , next to the test case’s title, to expand and view Step Summary table for each test case.
Figure: Step Summary table on TestArchitect Client

Figure: Step Summary table on a web browser

