Creating new actions
The steps needed to create a new user-defined action.
User-defined actions are kept in the Actions sub-tree of the project, to which you may also add any number of folders and subfolders to organize the actions, similar to the use of folders in the Tests tree. To create a new user-defined action, follow these steps:
Right-click the Actions folder, or its subfolder, and click New Action.
Fastpath: Ctrl + N
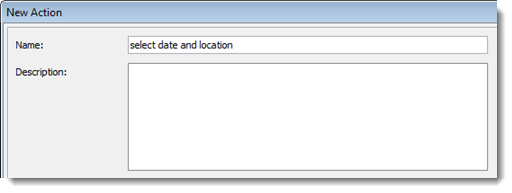
In the New Action dialog box, specify a name that can uniquely represent the action within the project. Other fields are optional, but for larger projects it is generally recommended that you supply values for them.

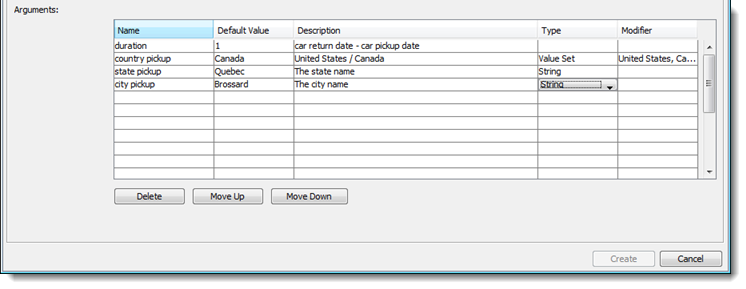
An important section of this dialog box is the list of arguments for the action. For each argument, you can specify a name, a default value, a description, a type and a modifier.
ヒント:- Refer to Argument types for argument types and associated argument modifiers.
- Use the Move Up and Move Down buttons to change the order of the arguments (which determines the order in which they will appear when you use the action in a test).

Click Create.
A new worksheet appears, headed by the name of the action, which is followed by a list of its arguments. This worksheet is known as the action definition for the new action. Any lines you add to this sheet are executed whenever the new action is invoked from a test module or from another action definition. (See also automating actions.)
- There is a useful shortcut for creating new actions on the fly. As mentioned, when you enter actions lines in the editor, any as-yet-undefined actions will appear in red text. By right-clicking the action name and selecting Create Action from the context menu (or selecting the cell and typing Ctrl + Alt + C), you are brought directly to the New Action dialog box, with the new action name pre-inserted into the Name field.
- An action may be scripted, which means that it is defined with a harness method or function, rather than through TestArchitect’s ABT language. If an action is scripted, it is a good idea to define the action name and its arguments with the New Action dialog box – this allows the test editor to know which argument headers to present in the future whenever the action is used in an action line. However, do not add any action lines to the action definition – that work is all handled by the harness code.
