Creating the test
Build a new test module based on the interface of the Car Rental sample application, and create a simple test that interacts with the AUT.
In the TestArchitect explorer tree, select any item within the current project, then click Create new test module
 in the toolbar.
The New Test Module dialog box appears.
Enter
Login Testas the name, then click Create.A new test module appears in the main panel, ready for editing.
In the editor, enter
Valid login (Access granted)as title for TEST CASE TC01 in the third column.In the OBJECTIVES section, enter
Access is granted for a valid loginas description for test objective TO 01 in the third column.Note that TO 01 under TEST CASE TC01 is automatically updated to reflect your changes.
Optional: In the leftmost cell of a row somewhere in the
INITIALsection, typeuse interface, with the argument Car Rental, leaving at least one blank line above it to allow for a header name: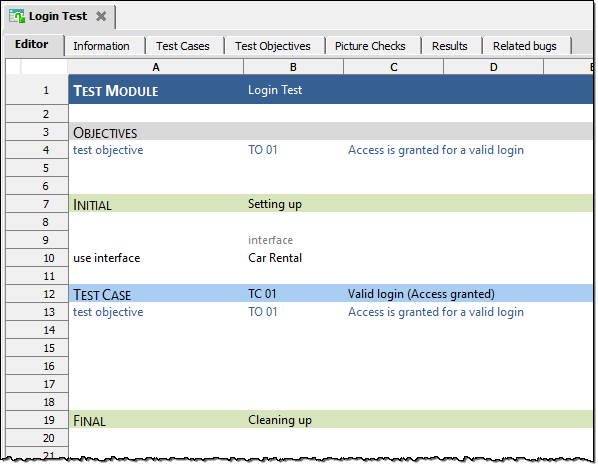 注意:This tells TestArchitect that you’re going to test against an application’s user interface and that the details for the windows and controls can be found in a TestArchitect interface called
Car Rental.注意:This TA interface, in contrast to a conventional application user interface, is an entity created in TestArchitect specifically to facilitate interfacing with the Car Rental application. The
Car Rentalinterface consists of a set of worksheet files called interface entities, and is found in the Interfaces subtree of theCar Rentalproject: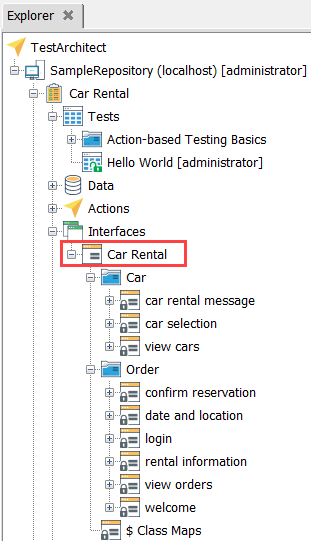
Refer to Creating an interface for further discussion on the topic of TestArchitect interfaces.
In the test case, add a new action line by typing
enter, again in the leftmost cell. (Note that actions, and only actions, must be entered in the leftmost column of the editor’s worksheet.)- 注意:enter is the standard action used for entering values into controls such as text boxes in the AUT. In this case, this action line is responsible for entering a user name. Note that the enter action accepts three arguments: window, control, and value.注意:You can move your cell pointer to the next cell by hitting the
EnterorTabkey. Once in the field for the window argument, hit yourspacekey. Note how this brings up a context-sensitive list of possible window names for the Car Rental AUT. (These names are defined in the Car Rental interface that you are using.) The same holds true when you enter the next argument, control.Enter the values
login,user name, andjohninto the line’s argument fields as shown below: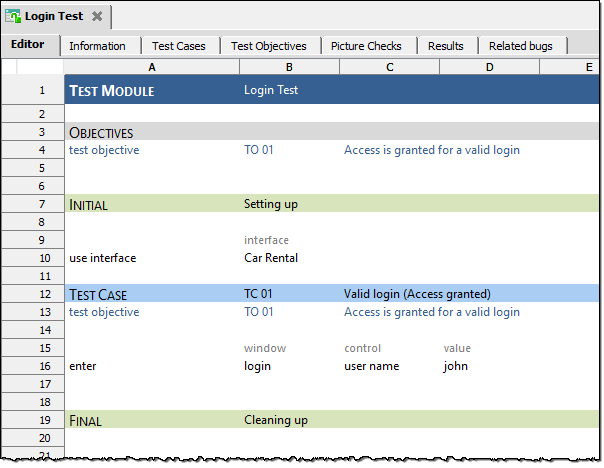
The values for the window and control arguments are the TA names for the Car Rental Login window and its User name text box, respectively. (In this instance, aside from being all lowercase, the two TA names are the same as their “real-world” counterparts, but that need not be the case.) The interface you have specified with the use interface action contains a set of mappings of TA names to the actual windows and controls in the AUT, including the Login dialog box, its fields, and its buttons.
A few rows below the
enteraction line, add a new action line by enteringclickin the leftmost cell.The click action in this action line will be used to click the Login button.
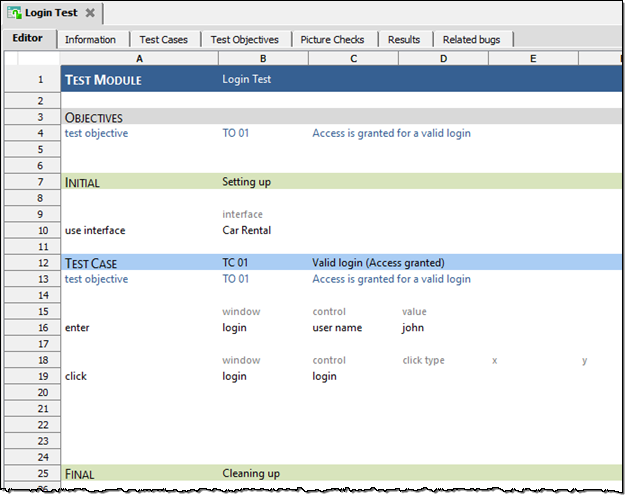
When you enter the click action, five arguments appear. TestArchitect displays the names of all possible arguments for an action, though all arguments don’t require values. Required arguments are listed first.
The available arguments for the click action are detailed below. For the purposes of this tutorial only the first two arguments are required: window and control.
- window: The TA name of the window containing the button to be clicked (the Login window)
- control: The TA name of the control to be clicked (the Login button on the Login window)
注意:Refer to Built-in actions of the TestArchitect Automation Guide for details regarding which arguments are required and which are optional for other arguments.A few rows below your
clickaction line, add a new line by entering check window exists in the leftmost cell.The check window exists action is used here to check for the existence of the Car Rental - Welcome window. If login is successful, the application is expected to display that window.
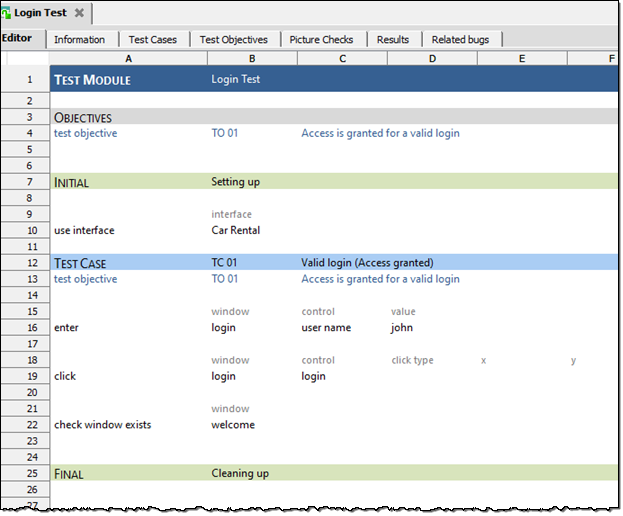
When you enter the check window exists action, only the window argument header appears, as that is all the information that the action requires.
You have now created your first test module which actually interacts with an AUT. In this case, your test clicks a button (Login) on a window, then tests the AUT to ensure that it has responded as expected (producing the Car Rental-Welcome window).
Next, you will run your test to ensure that it works as expected.
