Configuring WebDriver server & client
The topic guides you how to configure WebDriver server/client.
Each browser has its own WebDriver server:
- Chrome: ChromeDriver
- DriverFirefox: geckodriver
- Microsoft Edge: Microsoft WebDriver
- Microsoft Internet Explorer: Internet Explorer Driver Server
- Safari: Testing with WebDriver in Safari
However, browsers use the same WebDriver client’s file - Selenium Server Standalone.
The files of WebDriver server & client are packaged inside the TestArchitect installer. Unless you would like to use a different version of WebDriver server/client, it is unnecessary to change the WebDriver server/client files, since by default TestArchitect automatically applies the files of the pre-packaged WebDriver server & client.
There are two methods to change the files of the WebDriver server/client:
Method #1: Via the Automation Agent Manager dialog box.
Download the preferred WebDriver server/client file into the test machine.
If the browser for which you want to change WebDriver server/client is running, close all its opened browser instances and terminate all its running background processes.
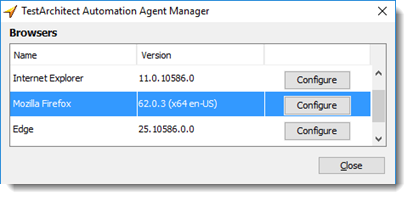
In TestArchitect, select menu: Tools > Automation Agent Manager.
In the TestArchitect Automation Agent dialog box, click the Configure button corresponding to the browser.

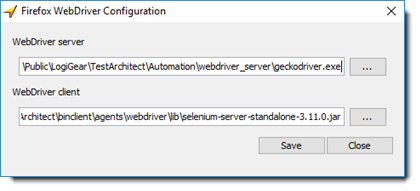
In the WebDriver Configuration dialog box,

- Specify the path to the executable file in the WebDriver server box.
- Specify the path to the executable file in the WebDriver client box.
- Click the Save button.
Method #2: Via the server/client key defined in the configure webdriver built-in action
Only when you need an advanced test environment, should you adopt this method.

If the network path of the WebDriver client is: \\LGVN17978\chromedriver\selenium-server-standalone-3.14.0.jar
In the JSON format, it will be: \\\\LGVN17978\\chromedriver\\selenium-server-standalone-3.14.0.jar
