Selecting multiple cloud devices at launch time
It is important to test mobile web applications on different cloud devices (smartphones, tablets, phablets, etc.) to ensure that it behaves in a consistent and correct manner on all of them. TestArchitect allows an automated test to run on multiple cloud mobile devices concurrently.
Ensure that the following requirements are met before implementing automated mobile web testing on multiple cloud devices in the Remote TestKit cloud service.
- In the Remote TestKit cloud service, rent iOS devices, and enable Xcode Connector. (Learn more.)
- Run Appium server on your local host.
- Install the SafariLauncher application.
In order to select multiple cloud devices at launch time concurrently, you must specify necessary desired capabilities in a file, which conforms to JSON format.
Notes:- Ensure that the number of rented cloud devices, which would run test concurrently, is available.
- You can learn more about JSON syntax here.
- To facilitate this process, TestArchitect provides predefined JSON templates for the Remote TestKit cloud service. (See below.)
Carry out the following steps:
Download the JSON template, provided by TestArchitect.
Open the downloaded JSON template file, and then modify the following desired capabilities that would fit your organization’s needs.
Remember:Each set of desired capabilities represents a single cloud device.
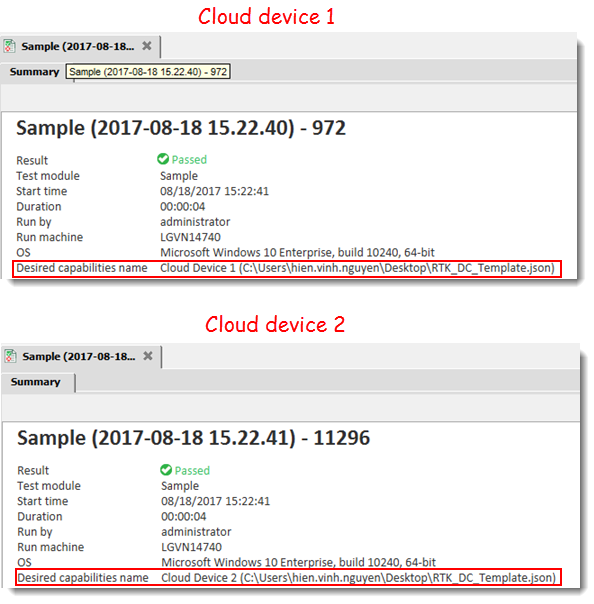
It is required to specify a unique name for each cloud device. Name of the executed cloud device will appear on test results.
{"<device_Name>": {"<desired_Capabilities>":"<value>"}}
For example:
- You’d like to call two concurrent iOS cloud devices to run your automated tests on Remote TestKit.
- Your JSON file might resemble the following.
[
  {
    "Cloud Device 1": {
      "URL": "http://192.168.169.137:4725/wd/hub",
      "platformName": "iOS",
      "deviceName": "1eca0a6d5b22f68feedd6a780dcf1db0057ac28f",
      "browserName": "safari",
      "newCommandTimeout": "600",
      "automationName": "XCUITest",
      "platformVersion": "9.3"
    }
  },
  {
    "Cloud Device 2": {
      "URL": "http://192.168.169.137:4725/wd/hub",
      "platformName": "iOS",
      "deviceName": "002ebf12-a125-5ddf-a739-67c3c5d20177",
      "browserName": "safari",
      "newCommandTimeout": "600",
      "automationName": "XCUITest",
      "platformVersion": "10.1"
    }
  }
]
Save your JSON file.
In TestArchitect Client, select the test module you want to run, and then click Execute
 on the TestArchitect toolbar.
In the Controllers/Devices panel, click the Select Controllers and Devices button.
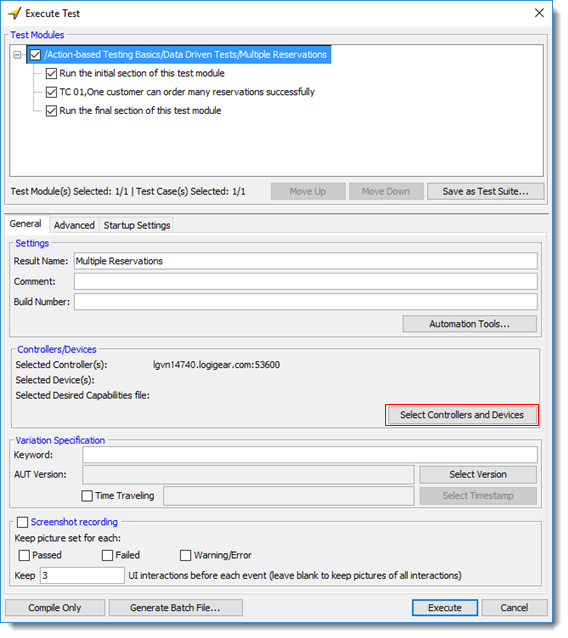
The Select Controller/Device dialog box appears.
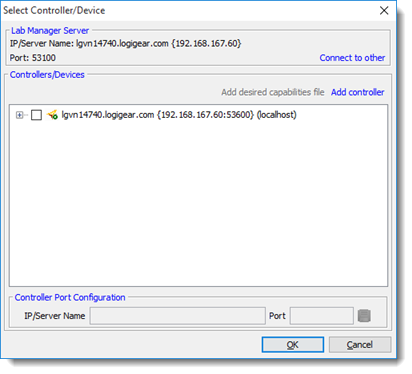
In the dialog box, select a controller to which cloud devices will be attached.
The controller will be in charge of distributing automated tests to cloud devices which satisfy all defined desired capabilities. The controller will also receive test results returned from the cloud devices.
The Add desired capabilities file text is now enabled.
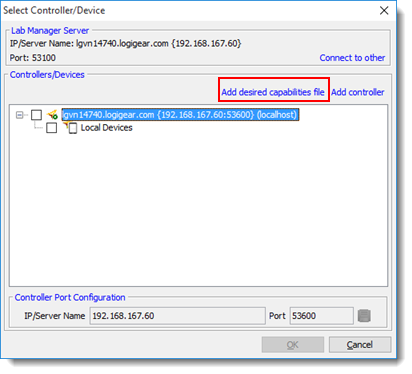
Click Add desired capabilities file to load a JSON file which defines desired capabilities.
In the Select dialog box, browse to the location of your JSON file, and then click the Select button.
Restriction:Only JSON files are accepted.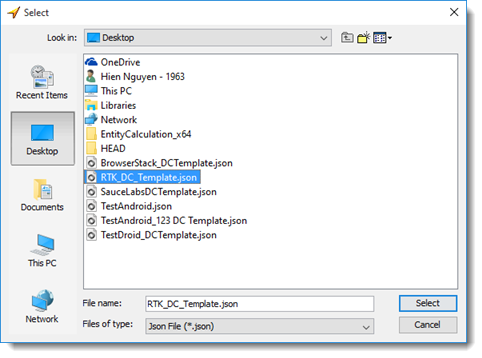
The JSON file is now loaded into the list of available cloud providers and appears as a tree node. Name of the tree node are automatically obtained from the JSON filename.
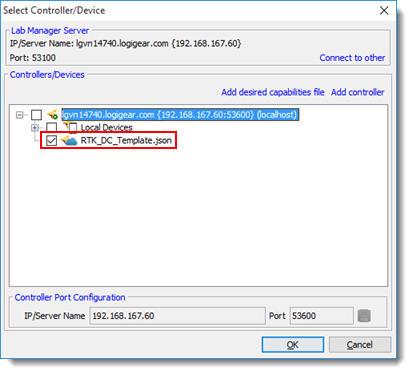 Tip:
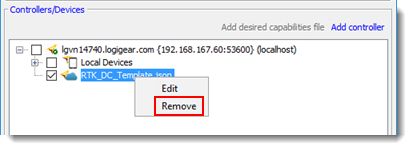
Tip:To remove the unnecessary JSON file, right-click the node, and then select Remove.
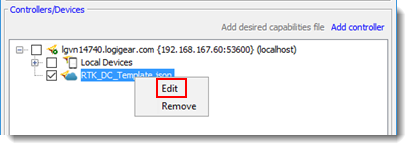
To replace the current JSON file with another file, right-click the node, and then select Edit.
On the Select Controller/Device dialog box, click OK.
The JSON filename is also displayed next to the Selected Desired Capabilities file label.

On the Execute Test dialog box, select Execute to execute the automated test on cloud devices which satisfy your defined desired capabilities.
The automated tests are run on target cloud devices. On test results, you will also see the name of the cloud device and the full path to JSON file, which defines target cloud devices. 