Creating a batch file
How to have TestArchitect generate a test execution batch file for you, with all the arguments set in accordance with your preferences.
After creating your test, launch the Execute Test dialog box.
Configure all the options in the Execute Test dialog box in accordance with your preferences.
Click Generate Batch File to create a batch file, for example a .bat file in Windows.
In the Save dialog box, browse to a location where you want to save the generated batch file.
Click Save.
The Creation of batch file complete message appears indicating the process is complete.
Click OK.
The Execute Test dialog box is closed.
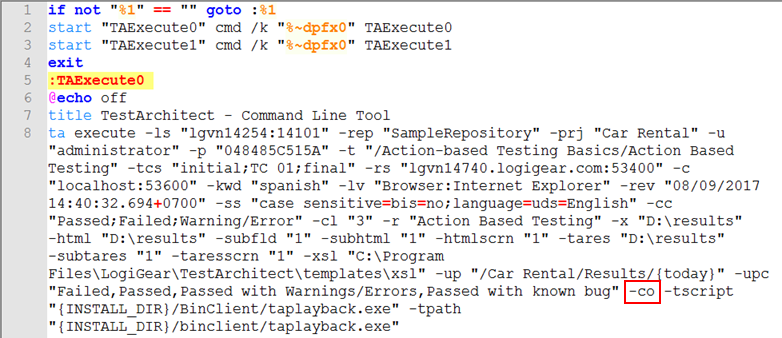
Optional: If you want to change the generated batch file to only compile tests and not run the tests when the batch file executes, manually add the -co flag to the file after the ta execute statement but before the last flag in the batch file, as shown below:
 Note:The -co flag can be inserted anywhere between the ta execute statement and before the last flag, as long as the insertion does not split the existing flag tokens.
Double-click the generated batch file to execute the batch run.