Executing multiple test modules
There are several means of running multiple test modules sequentially within a test run.
You can choose among the following methods to execute multiple test modules at once.
Option #1: Add test modules to the Execute Test dialog box.
Since test modules are executed in sequence, this is known as a serial test run.
In the TestArchitect explorer tree, expand <Project Name > Tests.
Select first test module to be executed, and then invoke the Execute Test dialog box by doing one of the following:
- Right-click the selection, and then select Execute Test.
- Alternatively, click the Execute
 button on the toolbar.
Drag other test modules to be executed node from the TestArchitect explorer tree, and then drop them into the Test Modules panel in the Execute Test dialog box.
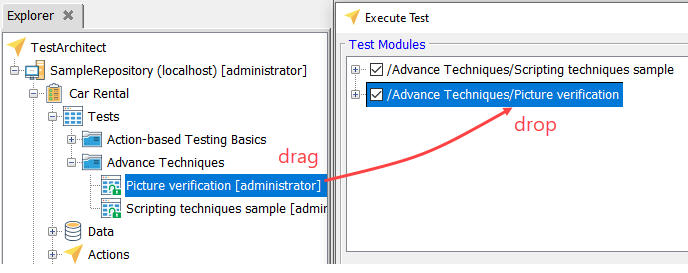 Note:
Note:If the dragged-and-dropped test module is a variation, the Keyword and/or AUT version boxes are automatically filled in.
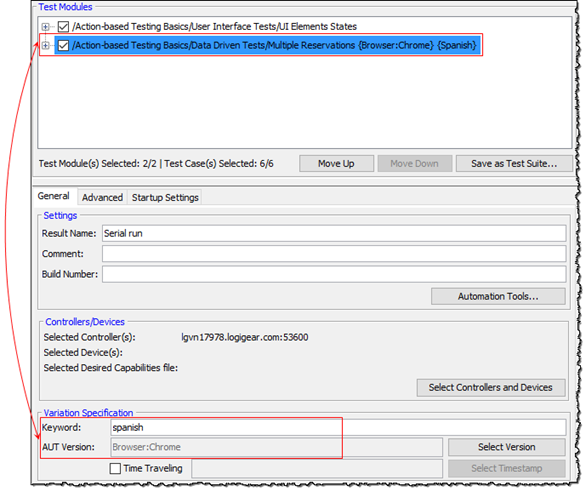
If the first-selected test module is a variation, the dragged-and-dropped is too. However, these two variations both belong to a same default variation. The latter replaces the former in the Execute Test dialog box, and its Keyword and/or AUT Version’s information.
In the Execute Test dialog box, click the Execute button.
Option #2: Execute a test folder.
This has the same effect as Option #1, in that multiple test modules are loaded into the Execute Test dialog box. Hence this is just another means of initiating a serial test run.
In the TestArchitect explorer tree, expand <Project Name > Tests.
Select a test folder, and then invoke the Execute Test dialog box by doing one of the following:
- Right-click the selection, and then select Execute Test.
- Alternatively, click the Execute
 button on the toolbar.
Note:If the selected test folder contains a default test module and its respective variations. You will see the following warning message. Since at a time, only one variation of a given test module can be executed.
After clicking OK, the variation located at the last position in the TestArchitect explorer tree is automatically picked up and displayed on the Test Modules panel.
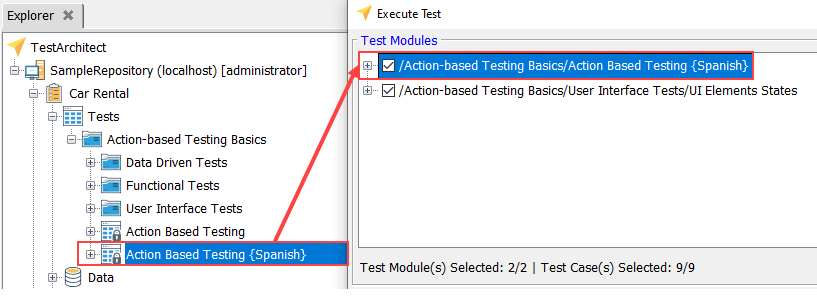
In the Execute Test dialog box, click the Execute button.
Option #3: Executing a test suite.
This again is another means of achieving a serial test run.
In the TestArchitect explorer tree, expand <Project Name > Test Suites.
Select a test suite or a test suite folder, and then invoke the Execute Test dialog box by doing one of the following:
- Right-click the selection, and then select Execute Test.
- Alternatively, click the Execute
 button on the toolbar.
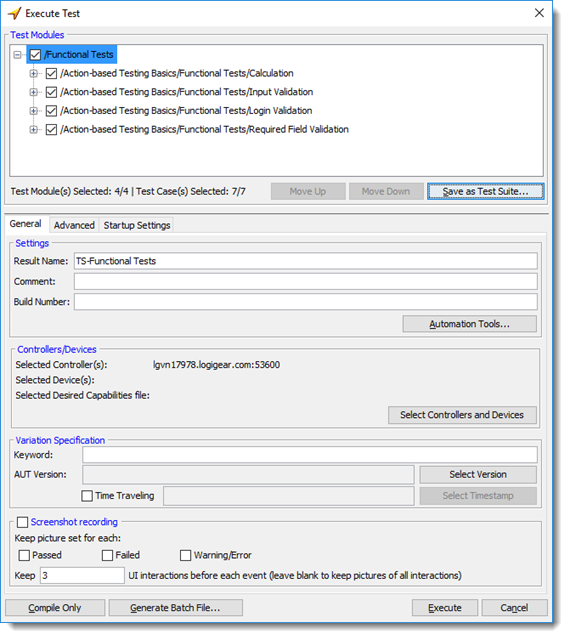
In the Execute Test dialog box, click the Execute button.
Tip:In the cases of Options #1 through #3, when the Execute Test dialog appears, you have the option to pick and choose which test modules and test cases are to be executed during the test.Option #4: Using the run test built-in action.
This method allows a test module to spawn the execution of other test modules during the course of its execution. In this case, the spawned tests are regarded as subtests.
In the TestArchitect explorer tree, expand <Project Name > Tests.
Double-click a test module to open it on the test editor.
This module is used to launch other test modules during its execution.
Drag other test modules to be executed from the TestArchitect explorer tree into the open test editor.
TestArchitect automatically inserts a run test action line for each of the dropped-in test modules.
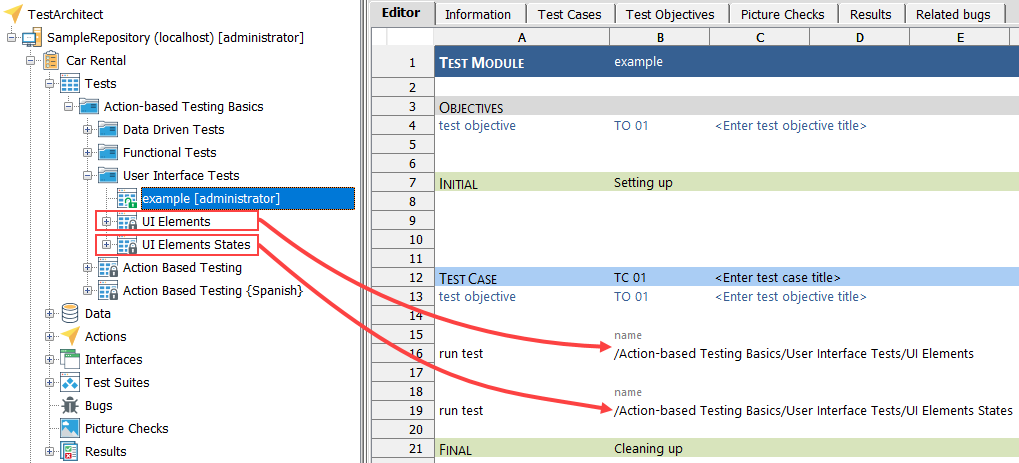 Important:If the dragged-and-dropped test module is a variation, the test module’s name in the name argument of run test is just a default, not a variation.
In the TestArchitect explorer tree, select the test module node.
Invoke the Execute Test dialog box by doing one of the following:
- Right-click the selection, and then select Execute Test.
- Alternatively, click the Execute
 button on the toolbar.
In the Execute Test dialog box, click the Execute button.