Running a Python harness test
Execute the test that calls the user-scripted action you implemented in thePython harness.
You have created a test case that calls the action hello, passing it an argument (Earth, in this example). Prior to that you implemented the action inPython, and created the necessary harness code to direct execution of action hello to your implemented definition of it.
With your test module displayed in the TestArchitect editor, click Execute
 on the toolbar.
The Execute Test dialog box appears.
Before clicking Execute, click Automation Tools.
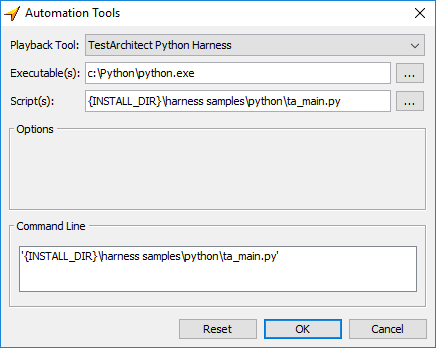
The Automation Tools dialog box appears.
Select TestArchitect Python Harness from Playback Tool option.
Click
 next to the Script(s) field to browse to the file
 ta_main.py. Note:The default location for the python executable(s) is c:\Python\python.exe. If you install Python in a different location, you’ll need to set the location, then move to the next step.Tip:To save time, install Python to the default location C:\Python\.
Additionally, from TestArchitect 8.5 onward, in the python_harness.bat file located in the folder C:\Program Files\LogiGear\TestArchitect\harness samples\python, the default value will be Python 3. If a user wants to use Python 2, they will need to modify the path in this file like below:

Click OK to return to the Execute Test dialog box.
Click Execute to run the test.
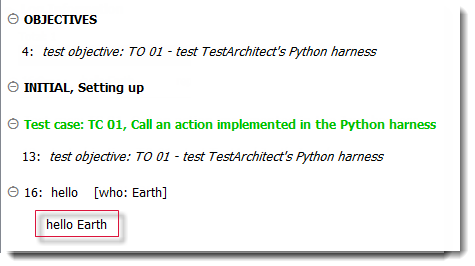
Upon completion of execution, the Result Details tab of the test results displays the text hello, followed by the value you entered as an argument to the action:
C:\Program Files\LogiGear\TestArchitect\lib\pythonSo far, you have created your own user-scripted action along with a test that runs it, but they have no interaction with the outside world. In the next exercise, you will create a user-scripted action that communicates with a target application.